Windows10 でDocker環境のお勉強メモ | Docker / Kubernetes 実践コンテナ開発入門(6.Kubernetesのデプロイ・クラスタ構築)
Docker / Kubernetes 実践コンテナ開発入門(6.Kubernetesのデプロイ・クラスタ構築)
>>次の記事
この記事は、「Docker/Kubernetes 実践コンテナ開発入門」の書籍を見ながら実践しています。実際の開発に即した内容となっており良書でした。
6.Kubernetesのデプロイ・クラスタ構築
初めにGoogle Cloud Platform/Google Kubernates Engineの準備をした後、アプリケーションのデプロイをします。
アプリケーションのデプロイの順番は、バックエンド側からフロント側に向けて準備していきます。
- データストア
- アプリケーションサーバ
- ウェブサーバ
6.1 Google Kubernetes Engineのセットアップ
Google Cloud Platformの利用手続き
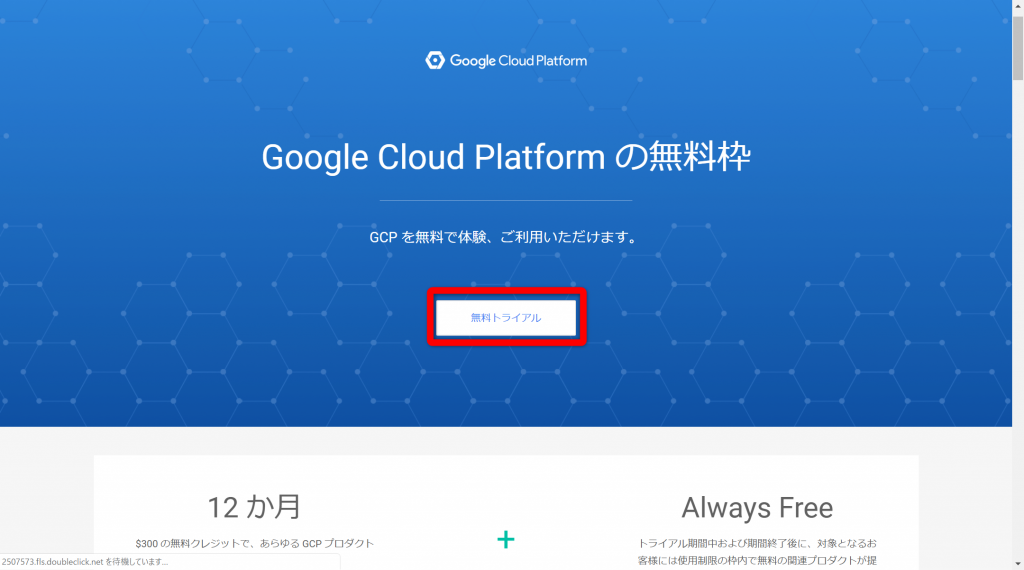
以下のURLへアクセスします。アクセスしたら「無料トライアル」を押します。
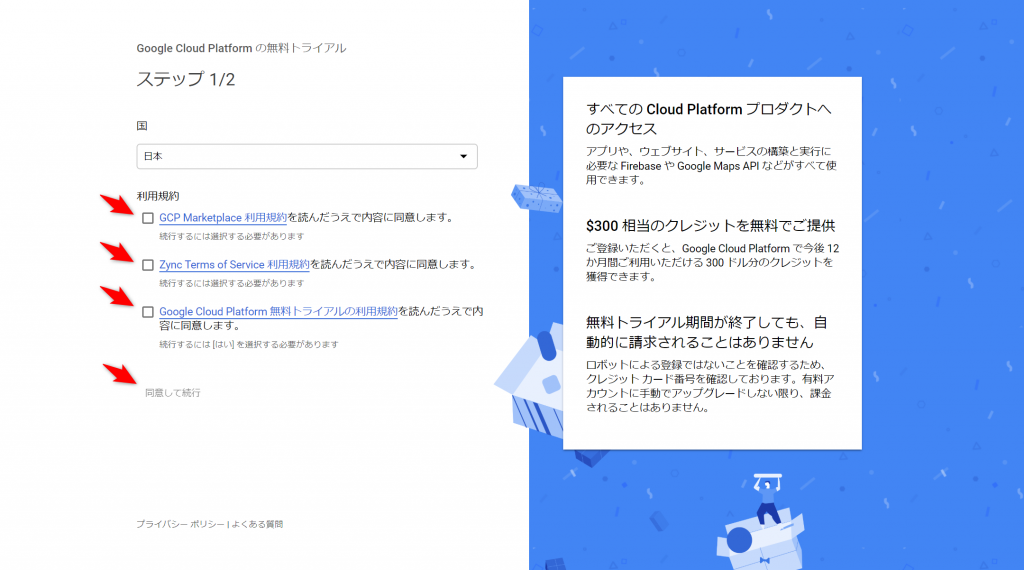
利用規約のチェックボックスにチェックし、「同意して続行」を押します。
必要事項を入力して、アカウントを作成ます。
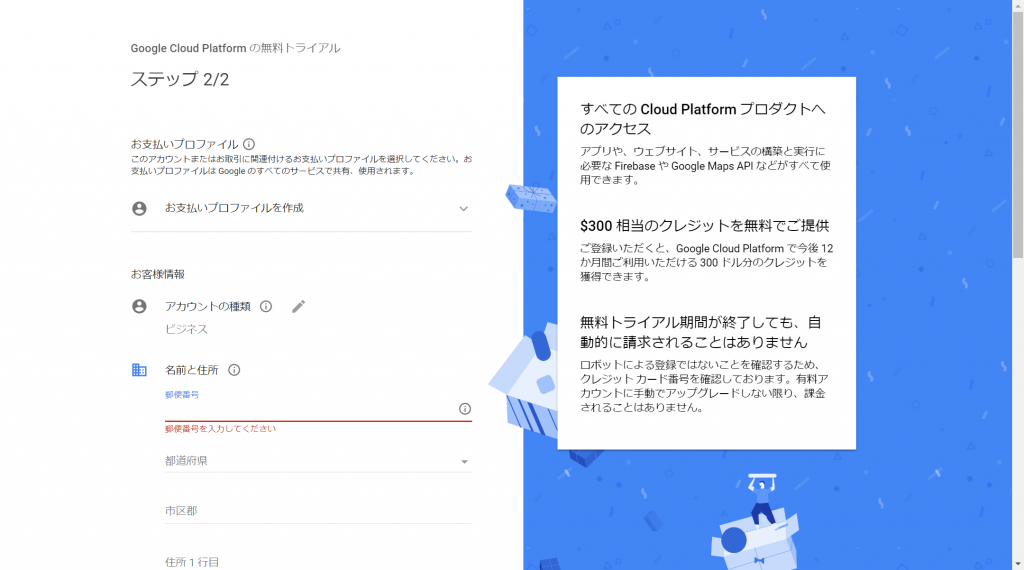
名前、住所、お支払方法を入力して、「無料トライアル」を押します。
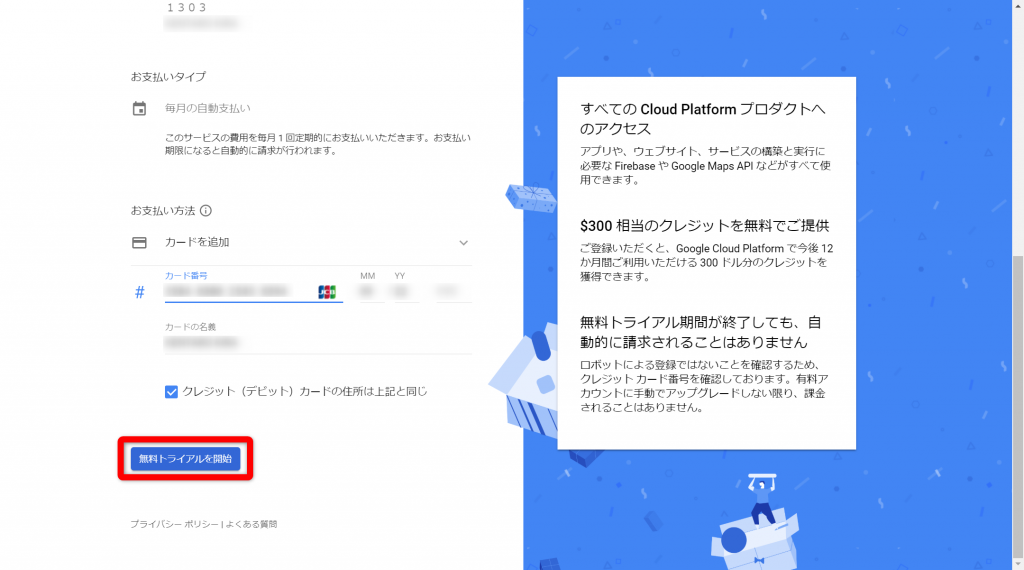
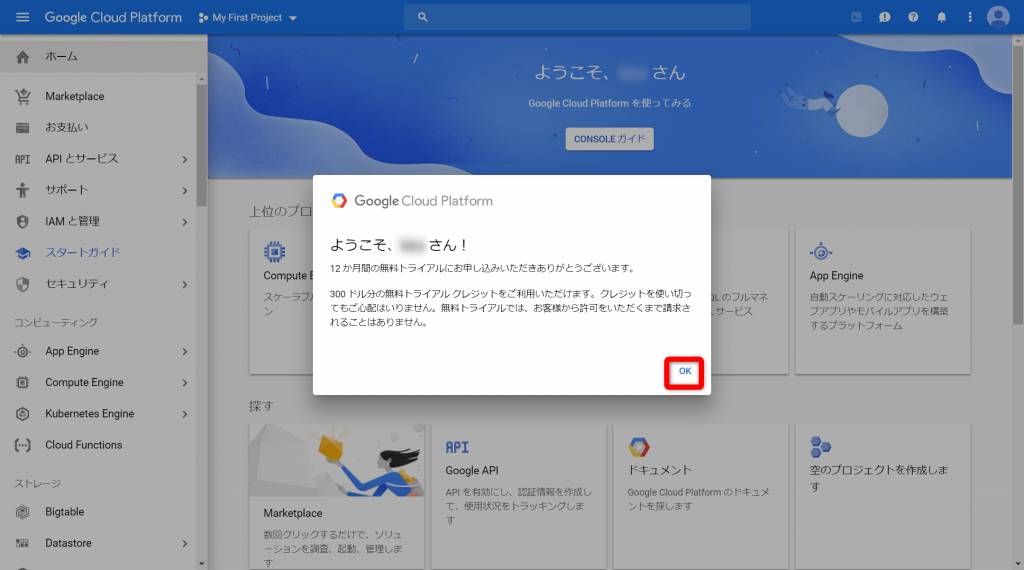
めでたく、Google Cloud Platformを利用できるようになりました。
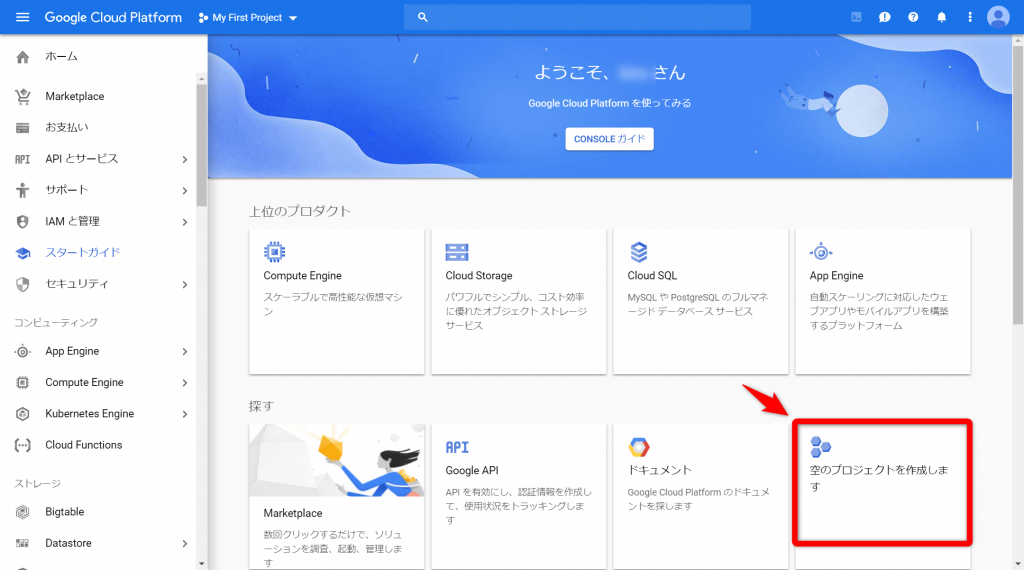
Google Cloud Platformでプロジェクト作成
Google Cloud Platformでプロジェクトを作成します。
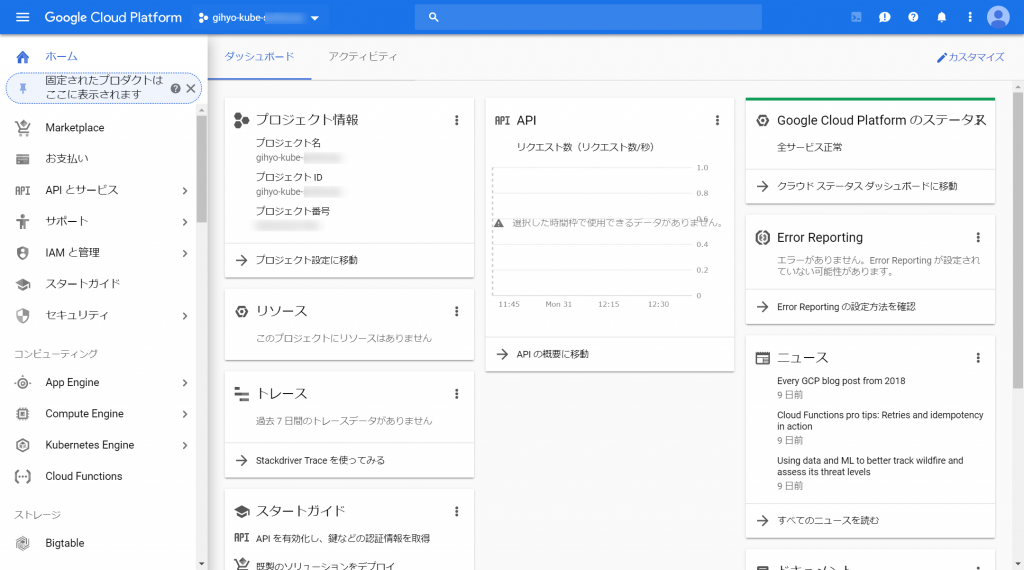
プロジェクト名は「gihyo-kube-XXXXX」、組織は「組織なし」としてます。

無事に作成が完了すると、プロジェクトの画面が表示されます。
Google Cloud SDK(gcloud)のセットアップ
次に、Google Cloud SDK(gcloud)のセットアップを行っていきます。
gcloudはコマンドラインからGCPをソーサするためのツールです。以下からツールをダウンロードします。
Google Cloud SDK(gcloud)のダウンロード
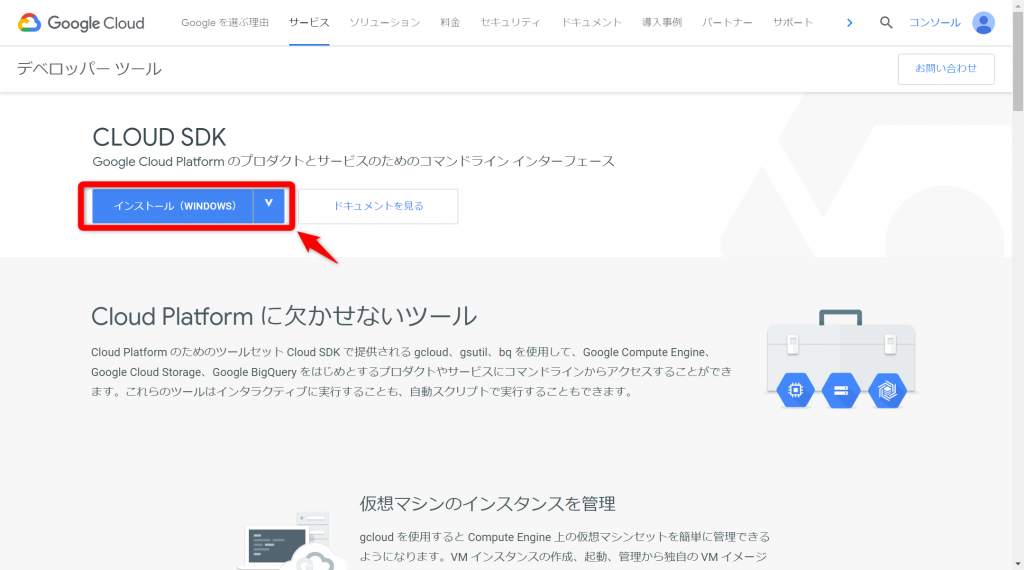
ダウンロードとインストールは、以下の画面に沿って行けばOKです。
Google Cloud SDK をインストールして初期化する方法、およびコマンドラインから
主要な gcloudコマンドを実行する方法について説明します。
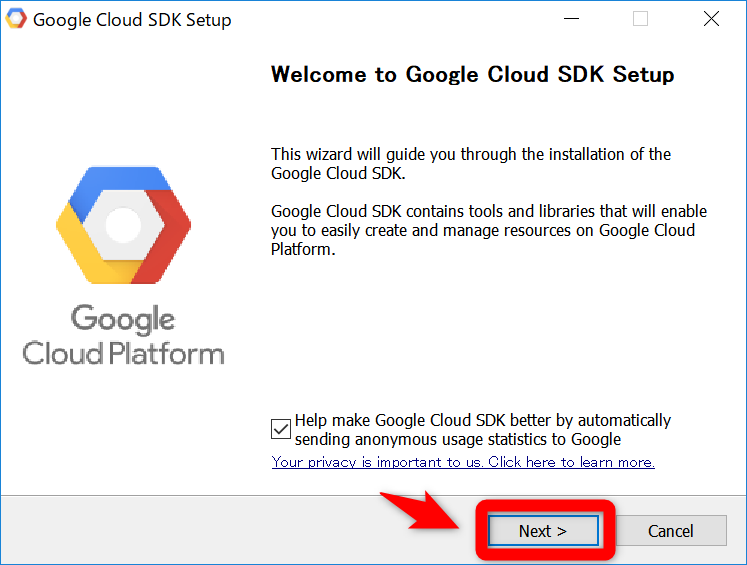
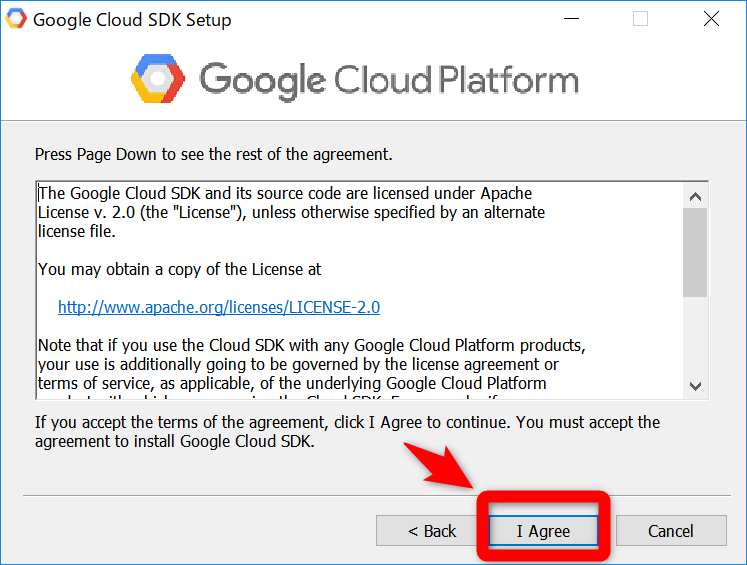
まずは、ダウンロードしたインストーラを起動します。

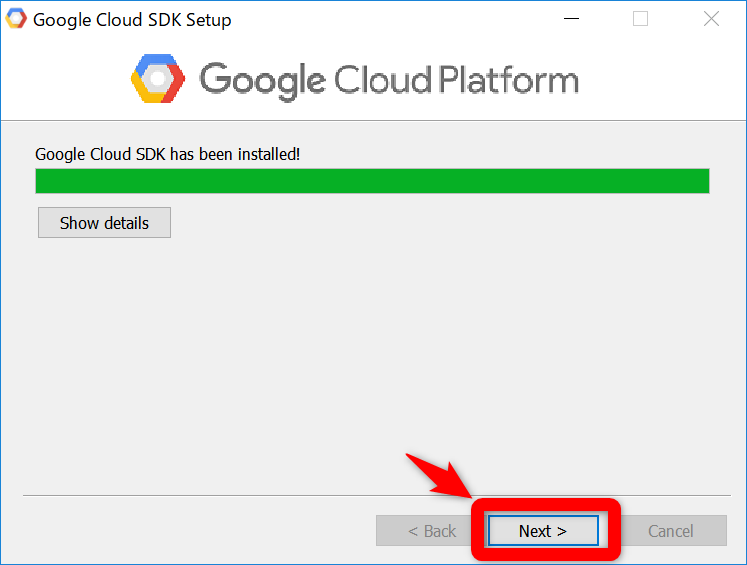
以下、手順に沿って、進めてい行きます。
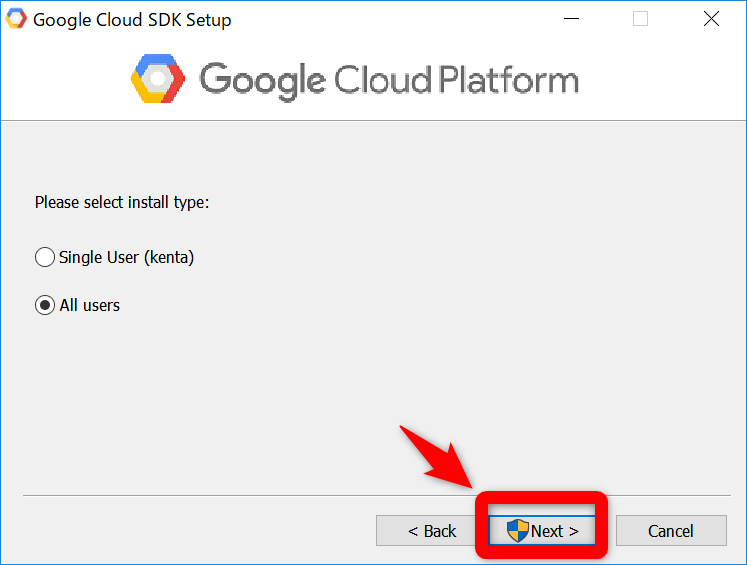
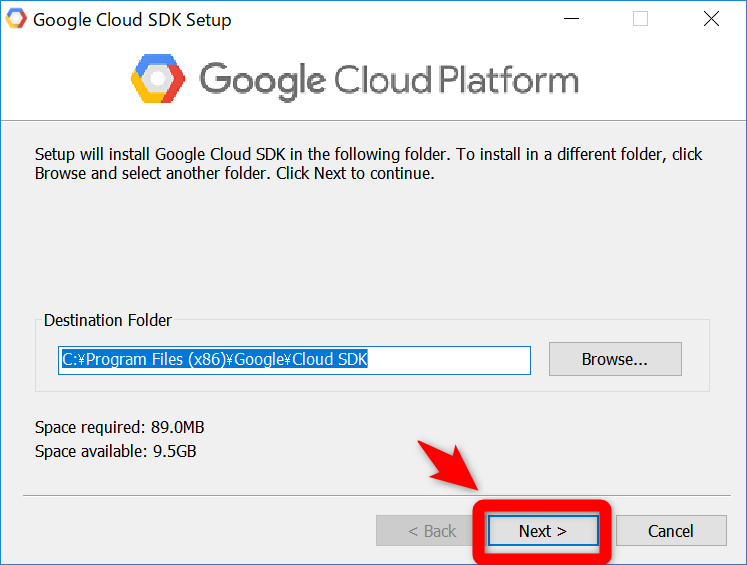
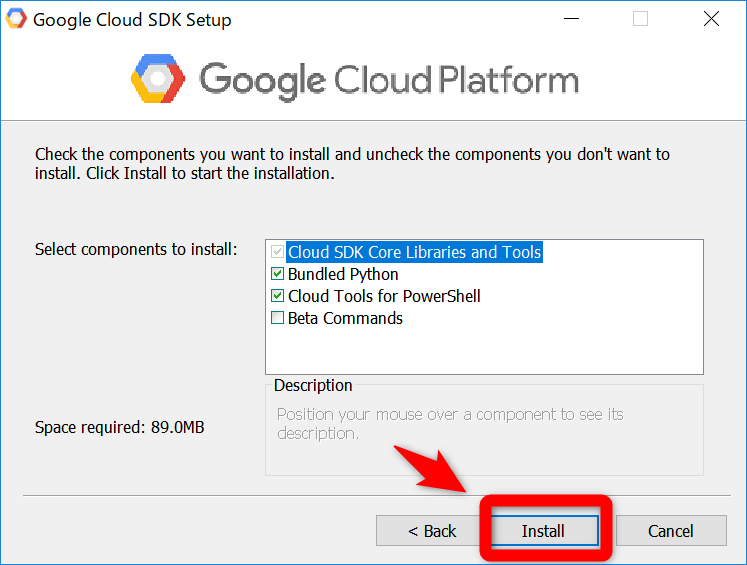
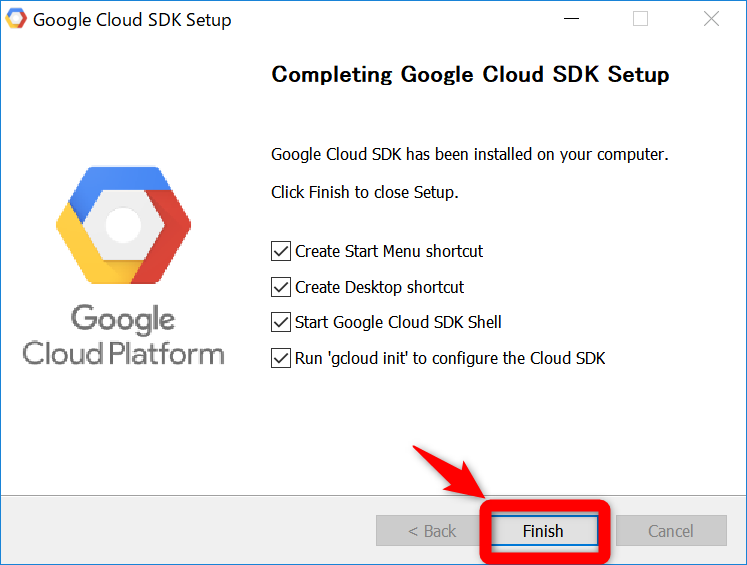
次のオプションが選択されていることを確認してください。
- Start Google Cloud SDK Shell
- Run ‘gcloud init’
これにより、ターミナル ウィンドウが開いて
gcloud initコマンドが実行されます。
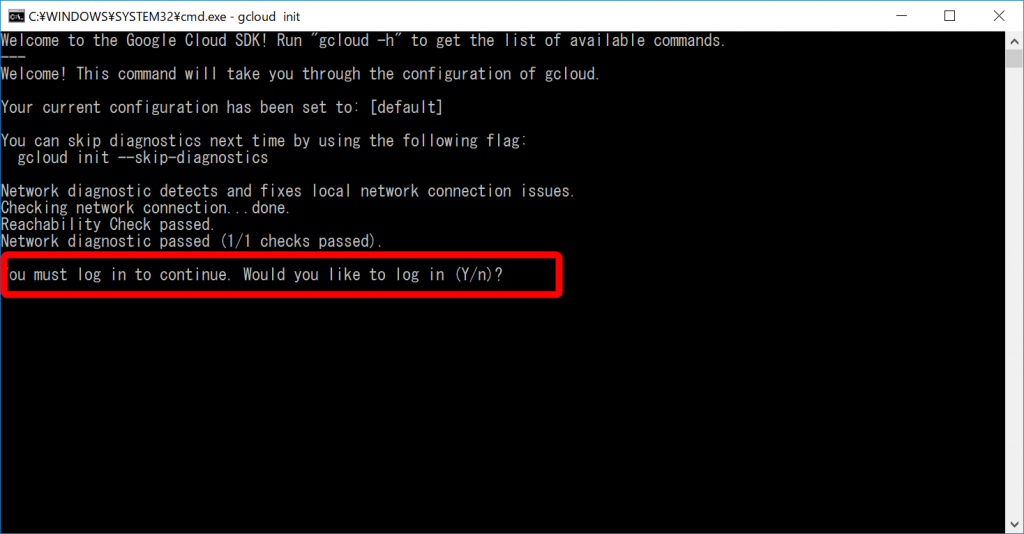
ターミナルが開いて、ログインするか聞かれるので「Y」と入力します。
ログインしたいユーザを選択します。

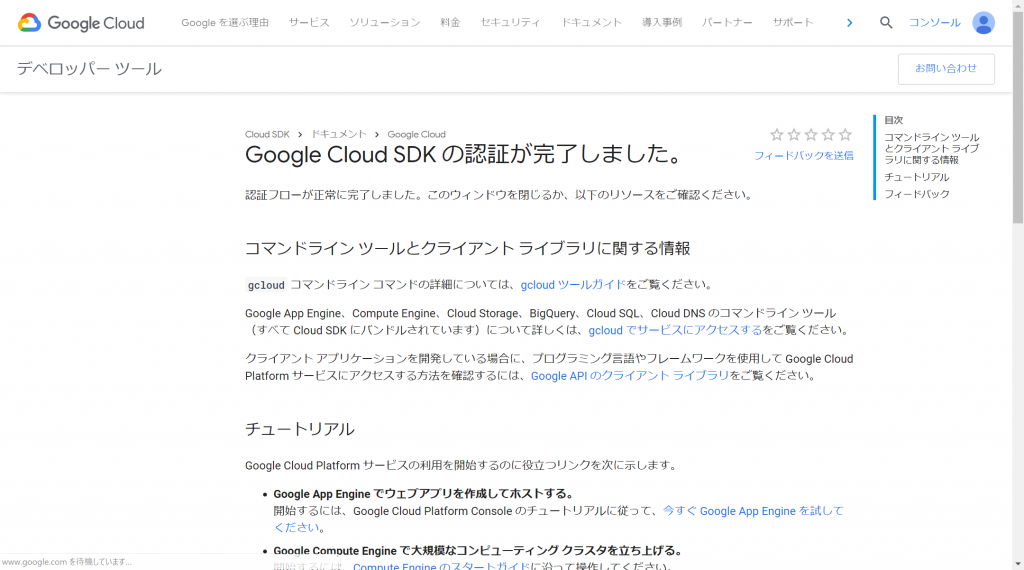
アクセスを許可します。

正常に終了すると、以下の完了画面が表示されます。
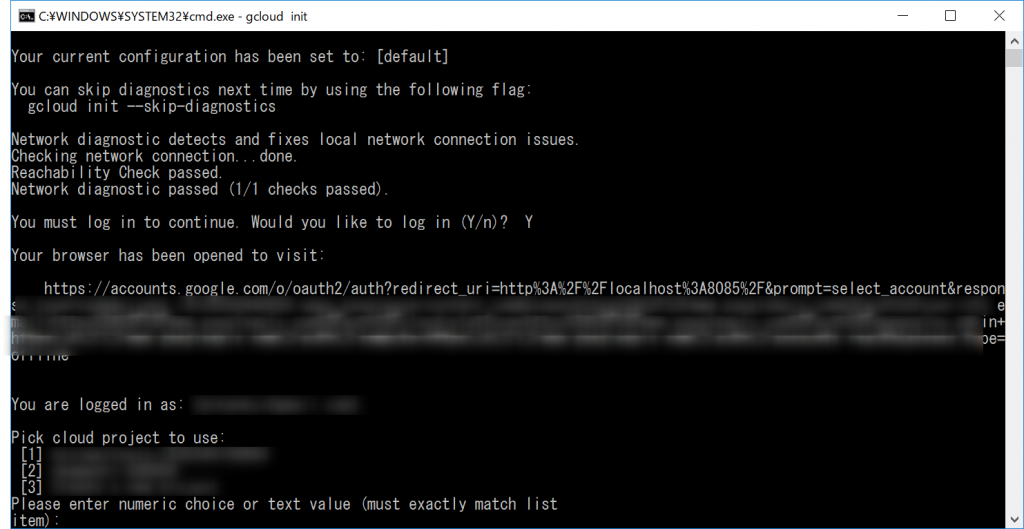
再度、コマンドプロンプトにもどるとログインが正常に終了しています。
プロジェクトを選択しろと言われるので、先ほど作成したプロジェクトを選択します。
または、以下のコマンドでセットすることも可能です。
C:\Program Files (x86)\Google\Cloud SDK>gcloud config set project gihyo-kube-XXXXX
Updated property [core/project].

C:\Program Files (x86)\Google\Cloud SDK>gcloud config set compute/zone asia-northeast1-a
Updated property [compute/zone].
Kubernetesクラスタの作成
以下のコマンドで、クラスタを作成します。
が、エラーが発生。実はプロジェクトを作成するときに別ユーザで作成したのでアクセス権限がないみたい。
\Program Files (x86)\Google\Cloud SDK>gcloud container clusters create gihyo --cluster-version=1.10.4-gke.2 --machine-type=n1-standard-1 --num-nodes=3
WARNING: Starting in 1.12, new clusters will have basic authentication disabled by default. Basic authentication can be enabled (or disabled) manually using the `--[no-]enable-basic-auth` flag.
WARNING: Starting in 1.12, new clusters will not have a client certificate issued. You can manually enable (or disable) the issuance of the client certificate using the `--[no-]issue-client-certificate` flag.
WARNING: Currently VPC-native is not the default mode during cluster creation. In the future, this will become the default mode and can be disabled using `--no-enable-ip-alias` flag. Use `--[no-]enable-ip-alias` flag to suppress this warning.
WARNING: Starting in 1.12, default node pools in new clusters will have their legacy Compute Engine instance metadata endpoints disabled by default. To create a cluster with legacy instance metadata endpoints disabled in the default node pool, run `clusters create` with the flag `--metadata disable-legacy-endpoints=true`.
This will enable the autorepair feature for nodes. Please see https://cloud.google.com/kubernetes-engine/docs/node-auto-repair for more information on node autorepairs.
WARNING: Starting in Kubernetes v1.10, new clusters will no longer get compute-rw and storage-ro scopes added to what is specified in --scopes (though the latter will remain included in the default --scopes). To use these scopes, add them explicitly to --scopes. To use the new behavior, set container/new_scopes_behavior property (gcloud config set container/new_scopes_behavior true).
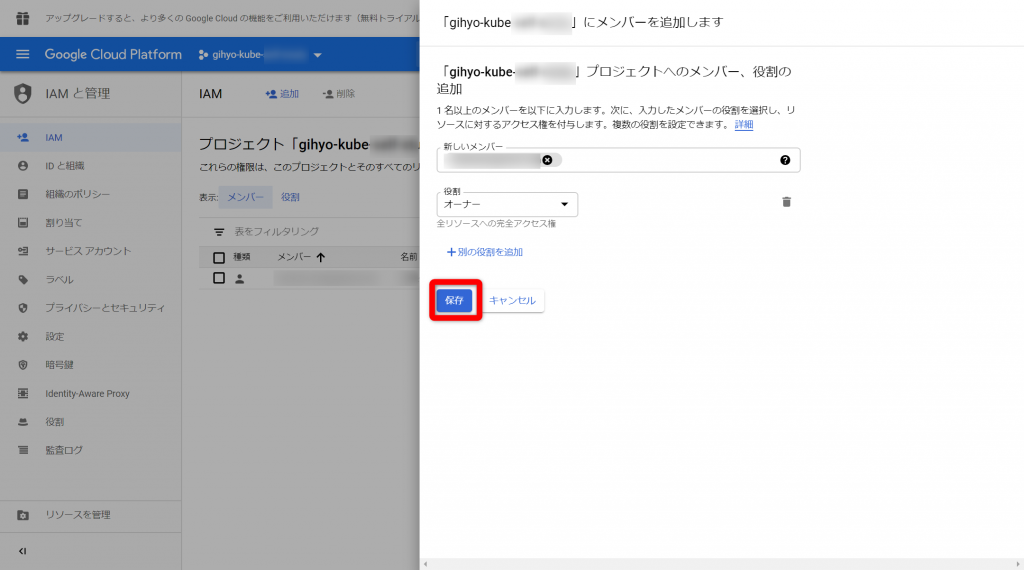
ERROR: (gcloud.container.clusters.create) ResponseError: code=403, message=Required "container.clusters.create" permission(s) for "projects/gihyo-kube-XXXXX". See https://cloud.google.com/kubernetes-engine/docs/troubleshooting#gke_service_account_deleted for more info.権限を付与するために、「IAM」の設定から、ユーザを追加します。
今回は、オーナー権限で追加しています。
リトライ! エラー!
今度は、Master version “1.10.4-gke.2″がサポート対象外とのこと
C:\Program Files (x86)\Google\Cloud SDK>gcloud container clusters create gihyo --cluster-version=1.10.4-gke.2 --machine-type=n1-standard-1 --num-nodes=3
WARNING: Starting in 1.12, new clusters will have basic authentication disabled by default. Basic authentication can be enabled (or disabled) manually using the `--[no-]enable-basic-auth` flag.
WARNING: Starting in 1.12, new clusters will not have a client certificate issued. You can manually enable (or disable) the issuance of the client certificate using the `--[no-]issue-client-certificate` flag.
WARNING: Currently VPC-native is not the default mode during cluster creation. In the future, this will become the default mode and can be disabled using `--no-enable-ip-alias` flag. Use `--[no-]enable-ip-alias` flag to suppress this warning.
WARNING: Starting in 1.12, default node pools in new clusters will have their legacy Compute Engine instance metadata endpoints disabled by default. To create a cluster with legacy instance metadata endpoints disabled in the default node pool, run `clusters create` with the flag `--metadata disable-legacy-endpoints=true`.
This will enable the autorepair feature for nodes. Please see https://cloud.google.com/kubernetes-engine/docs/node-auto-repair for more information on node autorepairs.
WARNING: Starting in Kubernetes v1.10, new clusters will no longer get compute-rw and storage-ro scopes added to what is specified in --scopes (though the latter will remain included in the default --scopes). To use these scopes, add them explicitly to --scopes. To use the new behavior, set container/new_scopes_behavior property (gcloud config set container/new_scopes_behavior true).

ERROR: (gcloud.container.clusters.create) ResponseError: code=400, message=Master version "1.10.4-gke.2" is unsupported.
2018/12/17のリリースノート見ると、もうバージョンは1.11台になってる。
New versions available for upgrades and new clusters
The following Kubernetes versions are now available for new clusters and for opt-in master upgrades for existing clusters:
- 1.11.2-gke.26
- 1.11.3-gke.24
- 1.11.4-gke.13
- 1.11.5-gke.5
The following Kubernetes versions are no longer available:
- 1.11.2-gke.18
- 1.11.2-gke.20
- 1.11.3-gke.18
- 1.11.4-gke.8
バージョンを書き換えて、リトライ!
またなんか出た。どうも「Kubernetes Engine API is not enabled」なので、APIを有効にしろってことかと。
C:\Program Files (x86)\Google\Cloud SDK>gcloud container clusters create gihyo --cluster-version=1.11.5-gke.5 --machine-type=n1-standard-1 --num-nodes=3
WARNING: Starting in 1.12, new clusters will have basic authentication disabled by default. Basic authentication can be enabled (or disabled) manually using the `--[no-]enable-basic-auth` flag.
WARNING: Starting in 1.12, new clusters will not have a client certificate issued. You can manually enable (or disable) the issuance of the client certificate using the `--[no-]issue-client-certificate` flag.
WARNING: Currently VPC-native is not the default mode during cluster creation. In the future, this will become the default mode and can be disabled using `--no-enable-ip-alias` flag. Use `--[no-]enable-ip-alias` flag to suppress this warning.
WARNING: Starting in 1.12, default node pools in new clusters will have their legacy Compute Engine instance metadata endpoints disabled by default. To create a cluster with legacy instance metadata endpoints disabled in the default node pool, run `clusters create` with the flag `--metadata disable-legacy-endpoints=true`.
This will enable the autorepair feature for nodes. Please see https://cloud.google.com/kubernetes-engine/docs/node-auto-repair for more information on node autorepairs.
WARNING: Starting in Kubernetes v1.10, new clusters will no longer get compute-rw and storage-ro scopes added to what is specified in --scopes (though the latter will remain included in the default --scopes). To use these scopes, add them explicitly to --scopes. To use the new behavior, set container/new_scopes_behavior property (gcloud config set container/new_scopes_behavior true).
ERROR: (gcloud.container.clusters.create) ResponseError: code=403, message=Kubernetes Engine API is not enabled for this project. Please ensure it is enabled in Google Cloud Console and try again: visit https://console.cloud.google.com/apis/api/container.googleapis.com/overview?project=gihyo-kube-XXXXX to do so.
訪れてみろ言われたURLへアクセスしてみると、それっぽい画面が表示されました。https://console.cloud.google.com/apis/api/container.googleapis.com/overview?project=gihyo-kube-XXXXX
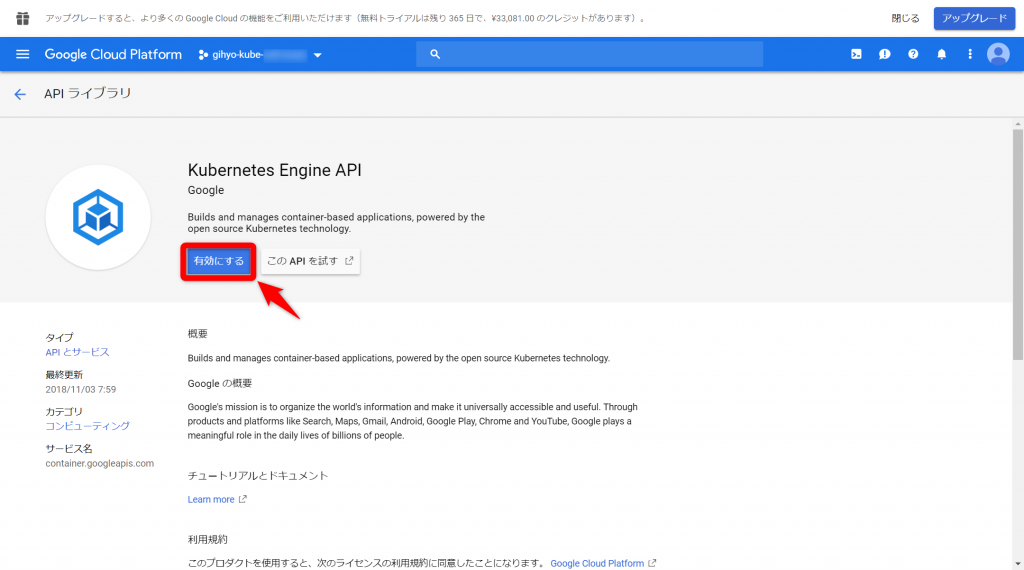
リトライ!できた!!
C:\Program Files (x86)\Google\Cloud SDK>gcloud container clusters create gihyo --cluster-version=1.11.5-gke.5 --machine-type=n1-standard-1 --num-nodes=3
WARNING: Starting in 1.12, new clusters will have basic authentication disabled by default. Basic authentication can be enabled (or disabled) manually using the `--[no-]enable-basic-auth` flag.
WARNING: Starting in 1.12, new clusters will not have a client certificate issued. You can manually enable (or disable) the issuance of the client certificate using the `--[no-]issue-client-certificate` flag.
WARNING: Currently VPC-native is not the default mode during cluster creation. In the future, this will become the default mode and can be disabled using `--no-enable-ip-alias` flag. Use `--[no-]enable-ip-alias` flag to suppress this warning.
WARNING: Starting in 1.12, default node pools in new clusters will have their legacy Compute Engine instance metadata endpoints disabled by default. To create a cluster with legacy instance metadata endpoints disabled in the default node pool, run `clusters create` with the flag `--metadata disable-legacy-endpoints=true`.
This will enable the autorepair feature for nodes. Please see https://cloud.google.com/kubernetes-engine/docs/node-auto-repair for more information on node autorepairs.
WARNING: Starting in Kubernetes v1.10, new clusters will no longer get compute-rw and storage-ro scopes added to what is specified in --scopes (though the latter will remain included in the default --scopes). To use these scopes, add them explicitly to --scopes. To use the new behavior, set container/new_scopes_behavior property (gcloud config set container/new_scopes_behavior true).
Creating cluster gihyo in asia-northeast1-a...done.
Created [https://container.googleapis.com/v1/projects/gihyo-kube-XXXXX/zones/asia-northeast1-a/clusters/gihyo].
To inspect the contents of your cluster, go to: https://console.cloud.google.com/kubernetes/workload_/gcloud/asia-northeast1-a/gihyo?project=gihyo-kube-XXXXX
kubeconfig entry generated for gihyo.
NAME   LOCATION           MASTER_VERSION  MASTER_IP     MACHINE_TYPE   NODE_VERSION  NUM_NODES  STATUS
gihyo  asia-northeast1-a  1.11.5-gke.5    35.200.3.243  n1-standard-1  1.11.5-gke.5  3          RUNNING
Cloud ConsoleのKunernetes Engineページでも作成されてことが確認できます。

gcloudからkubectlに認証情報を渡します。
C:\Program Files (x86)\Google\Cloud SDK>kubectl get nodes
NAME                                   STATUS    ROLES     AGE       VERSION
gke-gihyo-default-pool-1c2346a3-hbv5   Ready     <none>    14m       v1.11.5-gke.5
gke-gihyo-default-pool-1c2346a3-p33p   Ready     <none>    14m       v1.11.5-gke.5
gke-gihyo-default-pool-1c2346a3-p3g0   Ready     <none>    14m       v1.11.5-gke.5

C:\Program Files (x86)\Google\Cloud SDK>gcloud container clusters get-credentials gihyo
Fetching cluster endpoint and auth data.
kubeconfig entry generated for gihyo.

C:\Program Files (x86)\Google\Cloud SDK>kubectl get nodes
NAME                                   STATUS    ROLES     AGE       VERSION
gke-gihyo-default-pool-1c2346a3-hbv5   Ready     <none>    15m       v1.11.5-gke.5
gke-gihyo-default-pool-1c2346a3-p33p   Ready     <none>    15m       v1.11.5-gke.5
gke-gihyo-default-pool-1c2346a3-p3g0   Ready     <none>    15m       v1.11.5-gke.5
6.2 GKE上にTODOアプリケーションを構築する
下記構成のアプリケーションを構築します。
6.3 Master Slave構成のMySQLをGKE上に構築する
- MySQLでMaster/Slave構成を構築
- Dockerでの永続化データ実現は、標準ではデータボリュームを利用
- →ただしノードをまたがってコンテナを再配置する場合に手間がかかる
- Kubernetesではホストから分離可能な外部ストレージをボリュームとして利用可能
- Podがデプロイされたとき、外部ストレージのボリュームは自動で割り当てられる
- この仕組みの実現は、以下のKubernetesリソースで実現する
- PersistentVolume
- PersistentVolumeClaim
- StorageClass
- StatefulSet
- Access Modesは3つある
- ReadWriteOnce: 1つのノードからR/Wでマウントできる
- ReadOnlyMany: 複数のノードからReadOnlyでマウントできる
- ReadWriteMany: 複数のノードからR/Wでマウントできる
- Manifestはkubernetesの設定を記載したもの
- 以下参考にしたサイト。まとまっていて勉強になる。
- https://blog.a-know.me/entry/2018/08/14/185324
PersistentVolume / PersistentVolumeClaim
※今回MySQLを配置するうえでは使用しない
apiVersion: v1
kind: PersistentVolumeClaim
metadata:
  name: pvc-example
spec:
  accessModes:
    - ReadWriteOnce
  storageClassName: ssd      ←StorageClass.nameと紐づけ
  resources:
    requests:
      storage: 4Gi
StorageClass
- PersistentVolumeが確保するストレージの種類を定義
- PersistentVolumeClaimのstorageClassNameで指定した値の実体
- ストレージは「標準」と「SSD」の2種類
- provisionertとは、プロビジョニングに使用されるボリュームプラグインを決定
- 指定できる Volume Pluginの例
- AWSElasticBlockStore
- AzureFile
- AzureDisk
- CephFS
- Cinder
- FC
- Flexvolume
- Flocker
- GCEPersistentDisk ←今回使用
- Glusterfs
- iSCSI
- Quobyte
- NFS
- RBD
- VsphereVolume
- PortworxVolume
- ScaleIO
- StorageOS
- Local
kind: StorageClass
apiVersion: storage.k8s.io/v1
metadata:
  name: ssd
  annotations:
    storageclass.kubernetes.io/is-default-class: "false"
  labels:
    kubernetes.io/cluster-service: "true"
provisioner: kubernetes.io/gce-pd
parameters:
  type: pd-ssd
実行します。
D:\Git\selfstudy\docker-kubernetes\ch06\ch06_3_2>kubectl apply -f storage-class-ssd.yaml
storageclass.storage.k8s.io "ssd" created
StatefulSet
- StatefulSetは一意性をもつPodや永続化データをもつ場合に使用
- ↔Deploymet
- Podの識別子に連番を付与し、Podが再生成されても保たれる
- ストレージを同じPodに紐づけられる
- master/slaveの差異は環境変数とレプリカ数
- slaveはmasterを知っている必要があるため、MYSQL_MASTER_HOSTを指定
master側を作成
D:\Git\selfstudy\docker-kubernetes\ch06\ch06_3_3>kubectl apply -f mysql-master.yaml
service "mysql-master" created
statefulset.apps "mysql-master" created
slave側を作成
D:\Git\selfstudy\docker-kubernetes\ch06\ch06_3_3>kubectl apply -f mysql-slave.yaml
service "mysql-slave" created
statefulset.apps "mysql-slave" created
完成したpodを確認します。
D:\Git\selfstudy\docker-kubernetes\ch06\ch06_3_3>kubectl get pod
NAME             READY     STATUS    RESTARTS   AGE
mysql-master-0   1/1       Running   0          5m
mysql-slave-0    1/1       Running   0          3m
mysql-slave-1    1/1       Running   0          3m
master/slaveのマニュフェストは下記の通りです。
master
apiVersion: v1
kind: Service
metadata:
  name: mysql-master
  labels:
    app: mysql-master
spec:
  ports:
  - port: 3306
    name: mysql
  clusterIP: None
  selector:
    app: mysql-master

---
apiVersion: apps/v1
kind: StatefulSet
metadata:
  name: mysql-master
  labels:
    app: mysql-master
spec:
  serviceName: "mysql-master"
  selector:
    matchLabels:
      app: mysql-master
  replicas: 1
  template:
    metadata:
      labels:
        app: mysql-master
    spec:
      terminationGracePeriodSeconds: 60
      containers:
      - name: mysql
        image: gihyodocker/tododb:latest
        imagePullPolicy: Always
        args:
        - "--ignore-db-dir=lost+found"
        ports:
        - containerPort: 3306
        env:
        - name: MYSQL_ROOT_PASSWORD
          value: "gihyo"
        - name: MYSQL_DATABASE
          value: "tododb"
        - name: MYSQL_USER
          value: "gihyo"
        - name: MYSQL_PASSWORD
          value: "gihyo"
        - name: MYSQL_MASTER
          value: "true"
        volumeMounts:
        - name: mysql-data
          mountPath: /var/lib/mysql
  volumeClaimTemplates:
  - metadata:
      name: mysql-data
    spec:
      accessModes: [ "ReadWriteOnce" ]
      storageClassName: ssd
      resources:
        requests:
          storage: 4Gi
slave
apiVersion: v1
kind: Service
metadata:
  name: mysql-slave
  labels:
    app: mysql-slave
spec:
  ports:
  - port: 3306
    name: mysql
  clusterIP: None
  selector:
    app: mysql-slave

---
apiVersion: apps/v1
kind: StatefulSet
metadata:
  name: mysql-slave
  labels:
    app: mysql-slave
spec:
  serviceName: "mysql-slave"
  selector:
    matchLabels:
      app: mysql-slave
  replicas: 2
  updateStrategy:
    type: OnDelete
  template:
    metadata:
      labels:
        app: mysql-slave
    spec:
      terminationGracePeriodSeconds: 60
      containers:
      - name: mysql
        image: gihyodocker/tododb:latest
        imagePullPolicy: Always
        args:
        - "--ignore-db-dir=lost+found"
        ports:
        - containerPort: 3306
        env:
        - name: MYSQL_MASTER_HOST
          value: "mysql-master"
        - name: MYSQL_ROOT_PASSWORD
          value: "gihyo"
        - name: MYSQL_DATABASE
          value: "tododb"
        - name: MYSQL_USER
          value: "gihyo"
        - name: MYSQL_PASSWORD
          value: "gihyo"
        - name: MYSQL_REPL_USER
          value: "repl"
        - name: MYSQL_REPL_PASSWORD
          value: "gihyo"
        volumeMounts:
        - name: mysql-data
          mountPath: /var/lib/mysql
  volumeClaimTemplates:
  - metadata:
      name: mysql-data
    spec:
      accessModes: [ "ReadWriteOnce" ]
      storageClassName: ssd
      resources:
        requests:
          storage: 4Gi
6.4 TODO APIをGKE上に構築する
アプリケーションサーバを作成します。
D:\Git\selfstudy\docker-kubernetes\ch06\ch06_4>kubectl apply -f todo-api.yaml
service "todoapi" created
deployment.apps "todoapi" created
作成できているか確認します。
D:\Git\selfstudy\docker-kubernetes\ch06\ch06_4>kubectl get pod -l app=todoapi
NAME                       READY     STATUS    RESTARTS   AGE
todoapi-6467568d8f-jzbcp   2/2       Running   0          5m
todoapi-6467568d8f-q2dx4   2/2       Running   0          5m
nginx/apiは同一のマニュフェストに記載します。
apiVersion: v1
kind: Service
metadata:
  name: todoapi
  labels:
    app: todoapi
spec:
  selector:
    app: todoapi
  ports:
    - name: http
      port: 80

---
apiVersion: apps/v1
kind: Deployment
metadata:
  name: todoapi
  labels:
    name: todoapi
spec:
  replicas: 2
  selector:
    matchLabels:
      app: todoapi
  template:
    metadata:
      labels:
        app: todoapi
    spec:
      containers:
      - name: nginx
        image: gihyodocker/nginx:latest
        imagePullPolicy: Always
        ports:
        - containerPort: 80
        env:
        - name: WORKER_PROCESSES
          value: "2"
        - name: WORKER_CONNECTIONS
          value: "1024"
        - name: LOG_STDOUT
          value: "true"
        - name: BACKEND_HOST
          value: "localhost:8080"
      - name: api
        image: gihyodocker/todoapi:latest
        imagePullPolicy: Always
        ports:
        - containerPort: 8080
        env:
        - name: TODO_BIND
          value: ":8080"
        - name: TODO_MASTER_URL
          value: "gihyo:gihyo@tcp(mysql-master:3306)/tododb?parseTime=true"
        - name: TODO_SLAVE_URL
          value: "gihyo:gihyo@tcp(mysql-slave:3306)/tododb?parseTime=true"
6.5 TODO WebアプリケーションをGKE上に構築する
webサーバを作成します。
D:\Git\selfstudy\docker-kubernetes\ch06\ch06_5>kubectl apply -f todo-web.yaml
service "todoweb" created
deployment.apps "todoweb" created
apiVersion: v1
kind: Service
metadata:
name: todoweb
labels:
app: todoweb
spec:
selector:
app: todoweb
ports:
- name: http
port: 80
type: NodePort
---
apiVersion: apps/v1
kind: Deployment
metadata:
name: todoweb
labels:
name: todoweb
spec:
replicas: 2
selector:
matchLabels:
app: todoweb
template:
metadata:
labels:
app: todoweb
spec:
volumes:
- name: assets
emptyDir: {}
containers:
- name: nginx
image: gihyodocker/nginx-nuxt:latest
imagePullPolicy: Always
ports:
- containerPort: 80
env:
- name: WORKER_PROCESSES
value: "2"
- name: WORKER_CONNECTIONS
value: "1024"
- name: LOG_STDOUT
value: "true"
- name: BACKEND_HOST
value: "localhost:3000"
volumeMounts:
- mountPath: /var/www/_nuxt
name: assets
- name: web
image: gihyodocker/todoweb:latest
imagePullPolicy: Always
lifecycle:
postStart:
exec:
command:
- cp
- -R
- /todoweb/.nuxt/dist
- /
ports:
- containerPort: 3000
env:
- name: TODO_API_URL
value: http://todoapi
volumeMounts:
- mountPath: /dist
name: assets6.6 IngressでWebアプリケーションをインターネットに公開する
Ingressで外部へ公開します。
D:\Git\selfstudy\docker-kubernetes\ch06\ch06_6>kubectl apply -f ingress.yaml
ingress.extensions "ingress" created
作成できたか確認します。
D:\Git\selfstudy\docker-kubernetes\ch06\ch06_6>kubectl get ingress
NAME      HOSTS     ADDRESS          PORTS     AGE
ingress   *         35.244.185.119   80        2m
Ingressのマニュフェストです。
apiVersion: extensions/v1beta1
kind: Ingress
metadata:
name: ingress
spec:
rules:
- http:
paths:
- path: /*
backend:
serviceName: todoweb
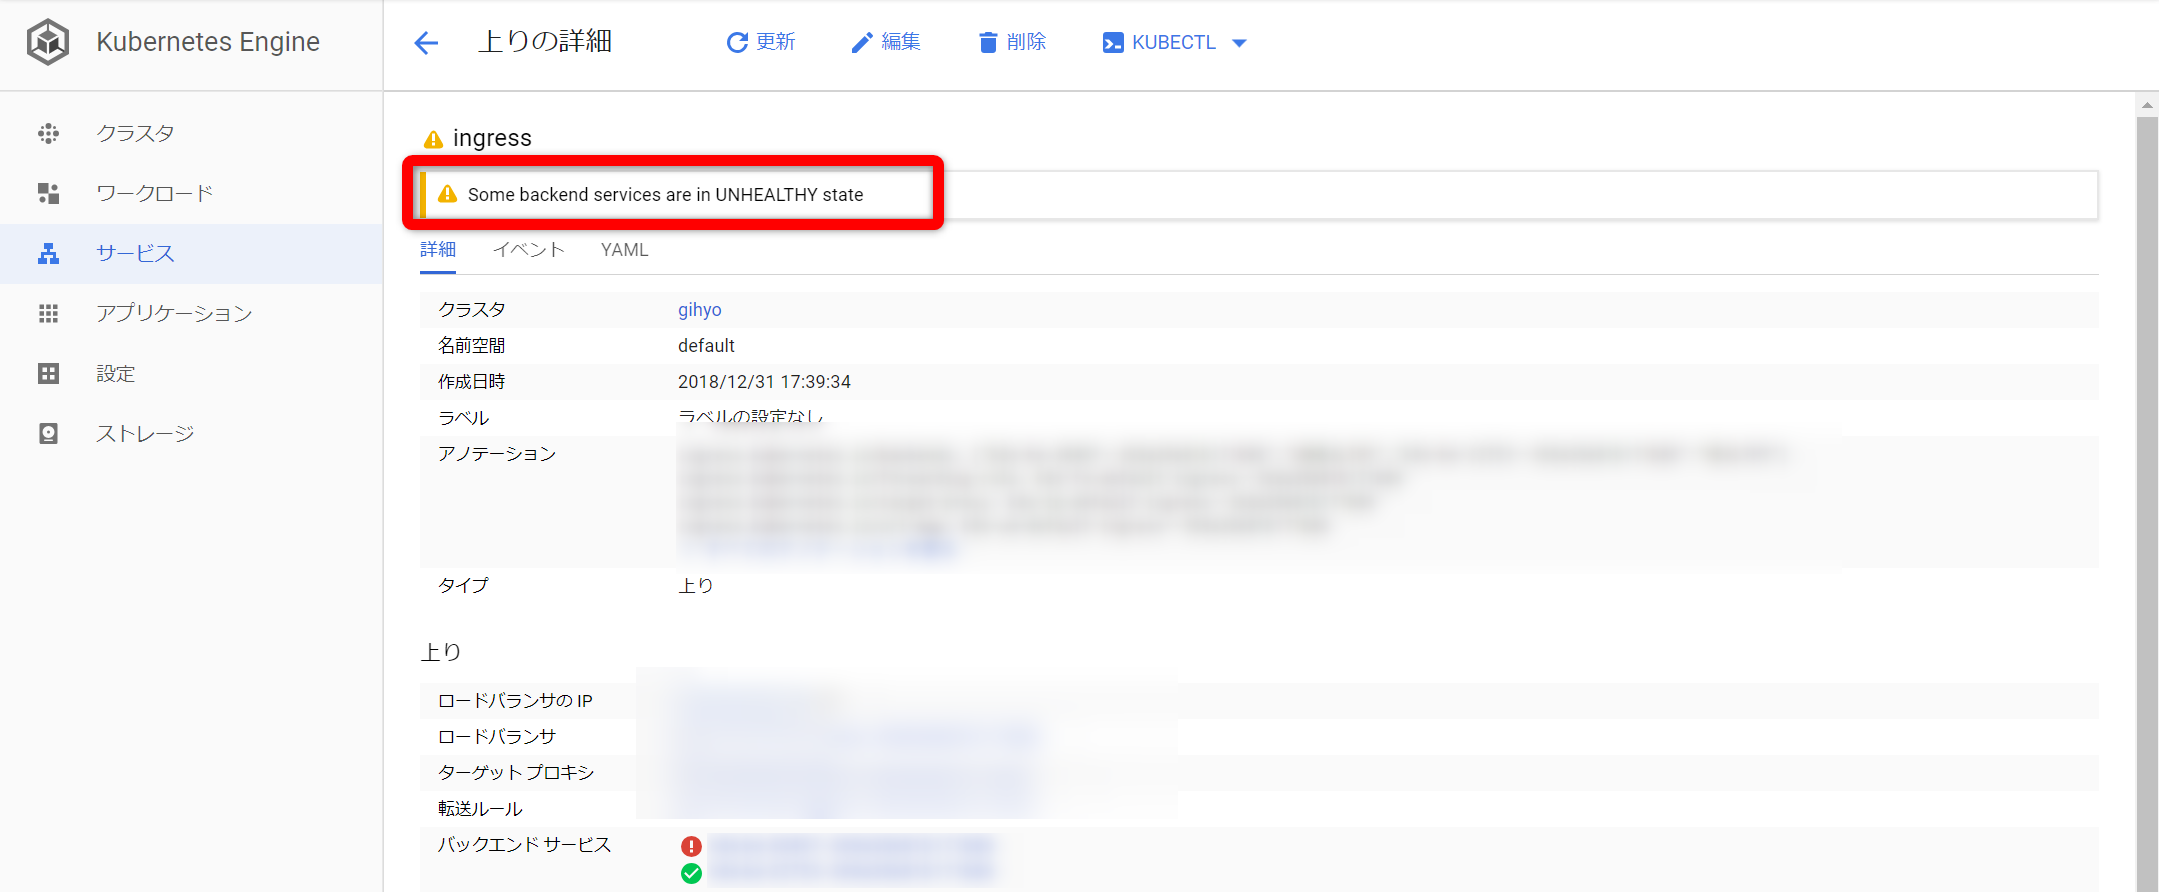
servicePort: 80ingressで警告が表示される。
ingressのエラーメッセージは「Some backend services are in UNHEALTHY state」
「UNHEALTHY」なので、意味としては健康でない?
死活チェックで、死んでいるとみられているよう?
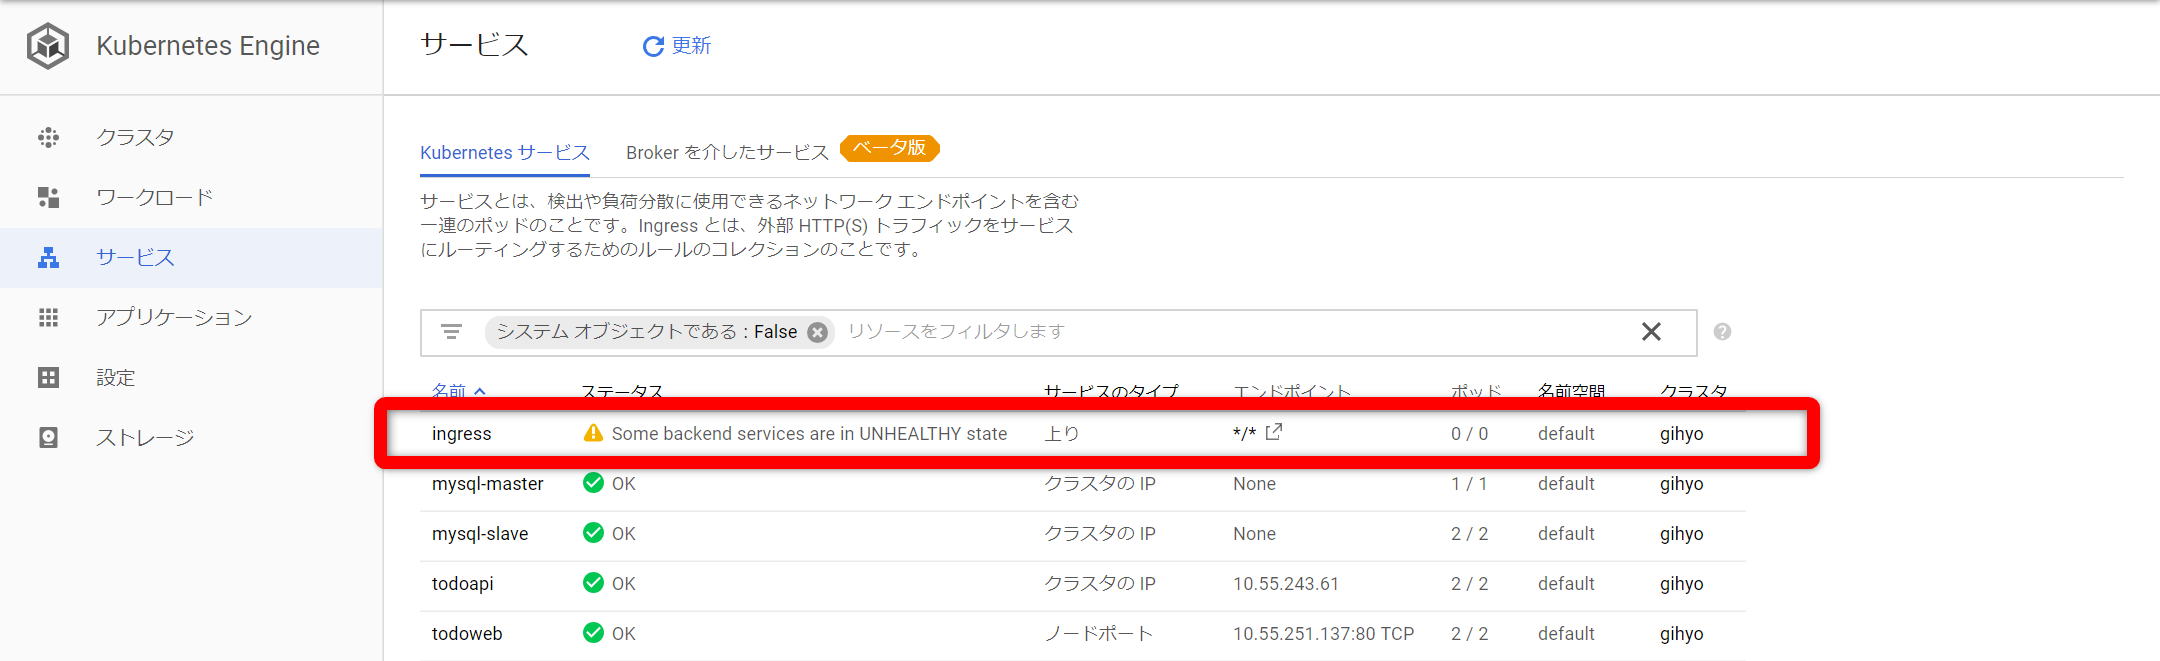
エラー内容が、片方のバックサービスはHEALTHYだけど、もう片方がUNHEALTYとなっている。
ingress.kubernetes.io/backends: {"k8s-be-30497--XXXXXXXXXXXXXXXX":"UNHEALTHY","k8s-be-32753--XXXXXXXXXXXXXXXX":"HEALTHY"}
「Some backend services are in UNHEALTHY state」対策
対策1
とりあえずIngressの削除/再作成
→変わらず同じエラー発生
対策2
バックエンドサービスが片方はOKになっている→WEBサービスのレプリカ数を2→1に変えてみる
---
apiVersion: apps/v1
kind: Deployment
metadata:
  name: todoweb
  labels:
    name: todoweb
spec:
  replicas: 1 ←もともとは2
確認。
→処理元のポッド数が変わるだけ(画像取り忘れた。処理元ポッド数が2つあるが、変更後は1つになった)、バックエンドサービスに変化なし

対策3
検討中。
googleを調べて、いつか気になる記事をみつけたけど、
調査するにはアプリの修正が必要そうなので、いったん保留。
6.7 オンプレミス環境でのKubernetesクラスタの構築
保留
6.8 kubesprayでKubernetesクラスタを構築する
保留
所感
記事が長くなりすぎた
>>次の記事
僕も同じ問題です。
解決しましたでしょうか?
結局解決できず、放置してしまっています…。お役に立てずすみません。